Sharpe Lab Blog

Instrument Development on the TTP project: learning from BlackMathTeachers.org

Jessica is an undergraduate RA in the Sharpe Lab; she’s a rising second-year student majoring in Neuroscience. One of the joyful parts of this pilot semester on the TTP project has been getting to know each other as a research team from many places and backgrounds. In this post, Jessica reflects on one of the processes of our instrument development on the Teacher Pipeline Program (TPP) pilot this semester, in which we drew on published research findings and data to refine initial drafts of our interview protocols.


Early in our work as a research group, Dr. Sharpe recognized the need for us all to think together about the big ideas we wanted to dig into when interviewing students in the TTP project. Since Hanyi and I come from outside the education field, it was important for us to learn about the lives and experiences of teachers of color – a focus of the TPP project – in order to grow our own understanding. Dr. Sharpe learned about BlackMathTeachers.org, the research website of the Examining the Trajectories of Black Mathematics Teachers project (Frank et al., 2019).

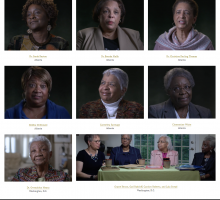
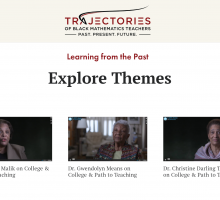
This NSF-funded project used a combination of interviews, focus groups, and surveys to learn about the past and present experiences of Black mathematics teachers around the US, in order to inform future research and practice in schools, professional development, and teacher education. The website includes a wealth of research findings and both raw and thematically edited video data of the team’s interviews with retired math teachers.

In our second meeting as a group, we individually watched several video interview clips from the ‘college and path to teaching’ theme because of its relevance to the TTP project. Each video was short, only 5-15 minutes long, but packed full of experience and knowledge none of us had ever really fully run into. After watching, we discussed major ideas in what we heard, and then discussed how to adjust our own interview questions and tactics accordingly. Our main prerogative for watching these interviews was to allow us to think more critically about the interview protocols Dr. Sharpe had already developed. Mainly, we wanted to gauge whether or not they would be successful in helping us obtain the rich data we were searching for from the high school students in our study.

One of the keystone questions being asked in every interview was Why teaching? A version of this question was asked in every video interview we watched, and seemed to be one of the first questions asked that allowed each teacher to truly share their experience. Interestingly, the Black math teachers’ own experiences with the education system, particularly in college, seemed to be what developed their interests most. We took this information and applied it to our own interview questions. Some new perspectives we wanted to explore through our questions was what history of teaching the students had in their families (if any). We were also interested in any unusual challenging experiences the students might have gone through, and how they shaped their path to teaching. When talking with students of color, this question felt particularly important.

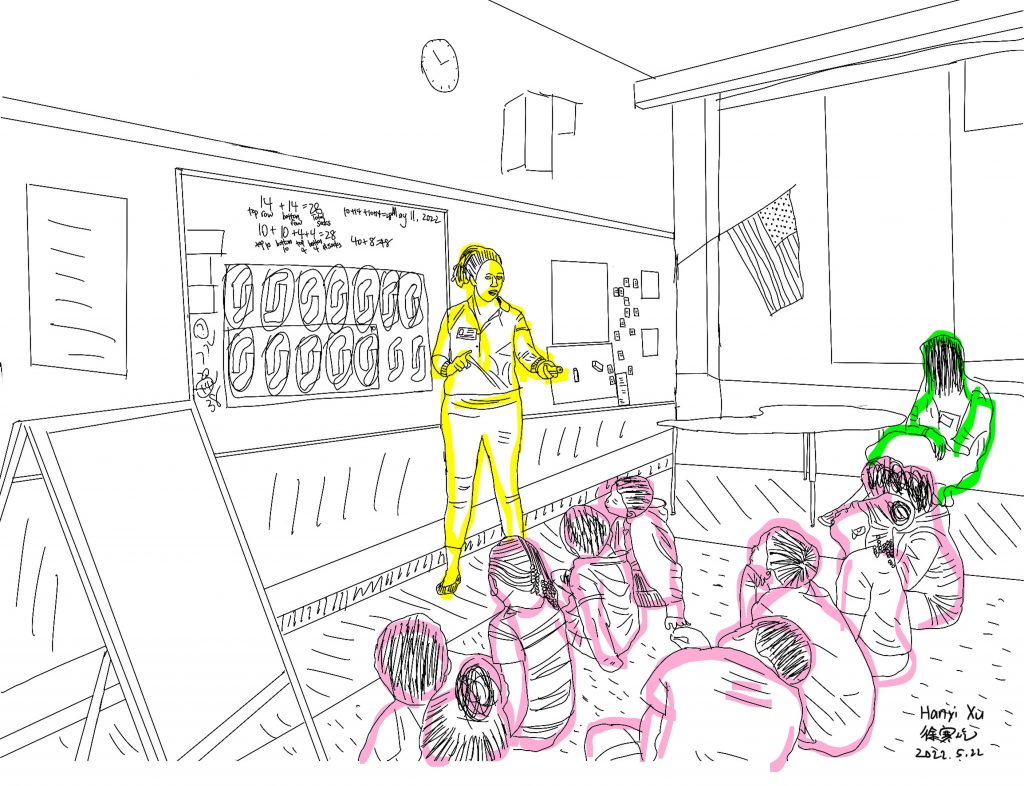
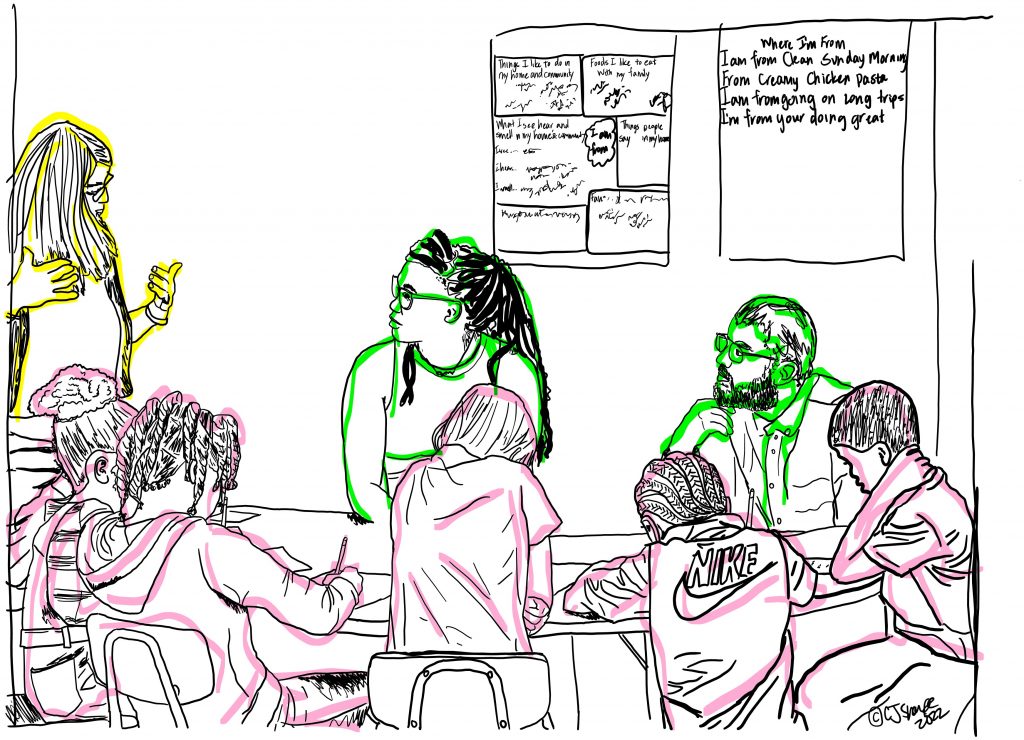
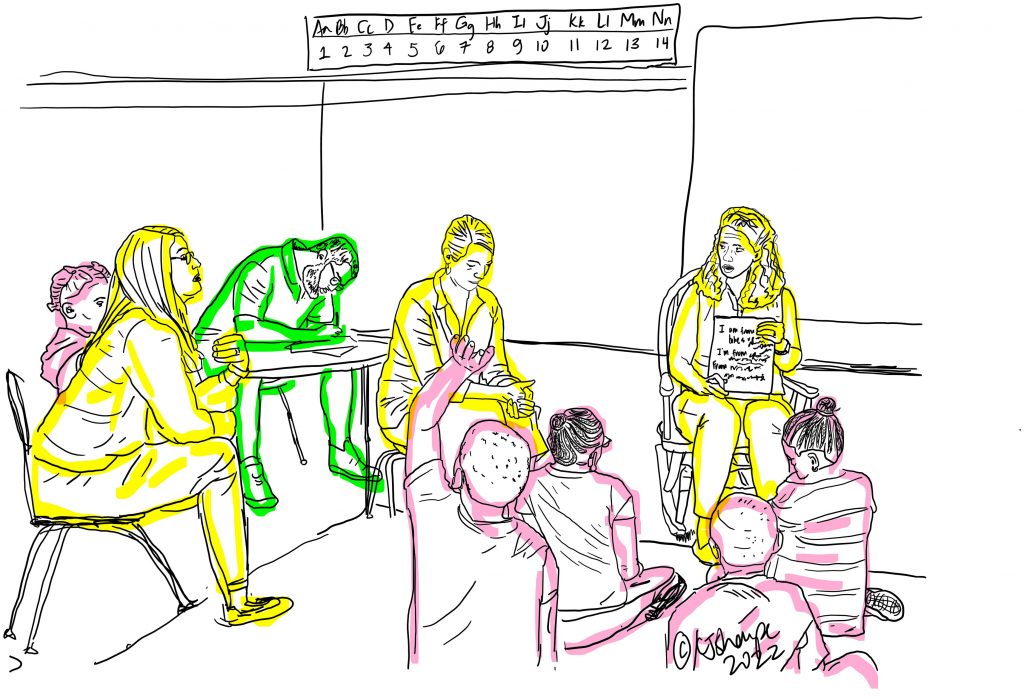
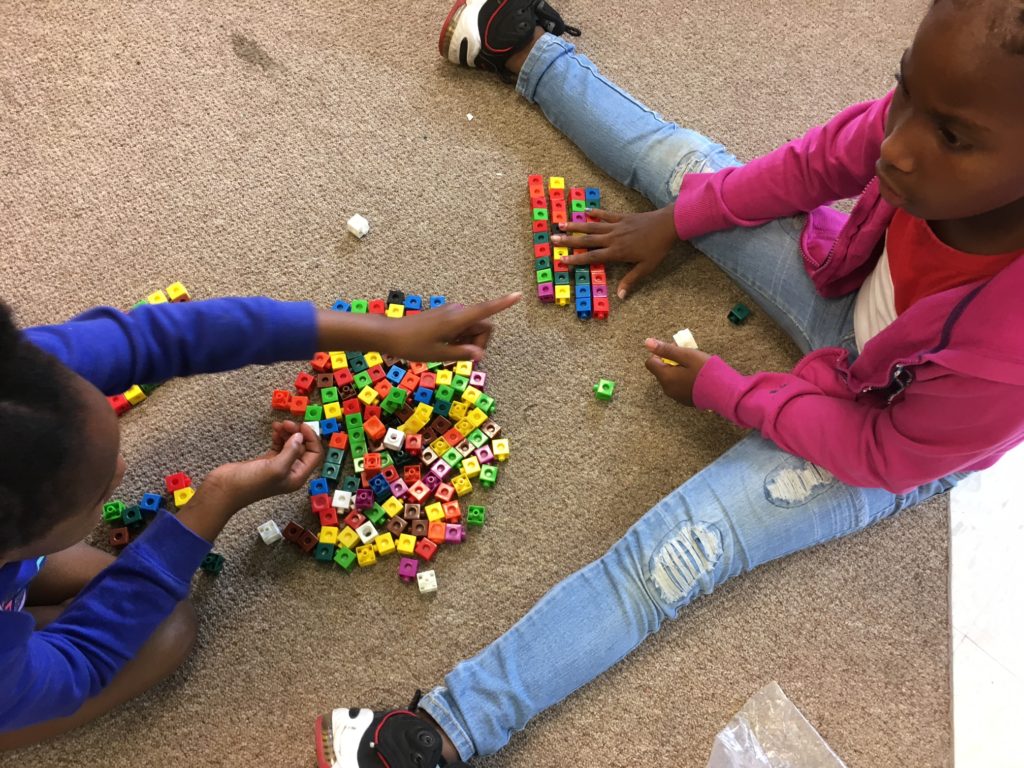
Another viewpoint we felt was important to touch base on in our interviews was the community each student felt they were surrounded by. We wanted to emphasize our consideration of their past and present school/ learning experience, in addition to their neighborhood or any teachers they felt connected to. Our hope was that not only would it help the students feel more comfortable and connected to their interviewer, but also get their perspective on the education system as it is. One of our goals through this research project was to encourage TTP students to stay in their communities as an educator. We asked students about how staying to teach in the area they grew up in would be beneficial for themselves and/or the students they would be teaching. This was a theme we revisited in focus groups and in our poetry mini-unit with 2nd grade students in mediated field experiences.

My own learning

Reflecting back on the process of revising our interview protocols, one thing I learned was the importance of allowing the interviewee to develop on their own thoughts without butting in, as it often led to some of the most important yet overlooked insights.

For instance, in her video interview, Dr. Sarah Keyton paused as she described the challenges of being a black female in the math field. After every long pause, she continued, eventually sharing how she felt incredibly intimidated at first.

This made me think about how at every crossroads or large change in my life, I’ve never thought twice about the authoritative figures in those settings. To me, every teacher was carefully labeled ‘The teacher’ in my head. Considering that the people in charge might be experiencing imposter syndrome or feel out of place isn’t a mindset I had ever experienced or thought about before.

This process also made me wonder how many of my teachers I’ve overlooked, simply because I didn’t think to ask about their own life experiences. I never took advantage of many of my teachers’ willingness to mentor on a deeper level. It’s easy to forget that many of my teachers wanted to do more than just teach. It takes a unique and wonderful individual to dedicate themselves to the art of teaching others, no matter the content.

Coaching in Mediated Field Experiences

One of the design features central to the TTP project is an integration of design principles from critical educator preparation (Lac, 2019) and models for practice-based teacher education (PBTE; Ball & Cohen, 1999; Forzani, 2014). This semester, we focused our 6-week pilot on PBTE models, using a design research approach to plan, act, analyze, and revise our designs. Specifically, we took 8 students from the TTP classroom to a neighboring elementary school, where they worked with 2nd graders in small groups to enact two math Quick Images minilessons, and a series of 3 writing minilessons focused on student poetry. The TTP students had engaged in these lessons first as learners, then rehearsed them in their teaching teams prior to enacting them with students. When possible, these mediated field experiences were followed by collective debriefs focused on student work and instructional next-steps.

In this short post, I use photosketches from inside the 2nd grade classroom to describe the different forms of coaching that happen in mediated field experiences. These practices aren’t new – they’ve been named and studied by many other scholars and teacher educators (e.g., Gibbons & Cobb, 2017; Desimone & Pak, 2017; Gibbons et al., 2021). In each photosketch, coaches are highlighted in yellow, aspiring teachers (high school juniors and seniors from the TTP program) are highlighted in green, and 2nd grade students are highlighted in pink.

Live Modeling

Mediated field experiences (MFEs) often begin or conclude with a short model lesson, usually focused on a content idea, student thinking strategy, or teaching practice that will be a central topic of the debrief.

Charlotte (yellow) models strategies for representing and annotating student thinking in a short number talk focused on an image of sock pairs. Students (pink) sit on the carpet, while TTP students (green) sit around the perimeter of the classroom.

Teacher time-outs

Teacher time-outs (TTOs; Gibbons et al., 2017) are a “pause button” in practice, which can be pressed by the novices or by a coach. When novices call a TTO, it may be because they’re stumped at how to make sense of student thinking or how to respond to a student’s question. When a coach calls a TTO, it may be because they see a critical moment emerging, and want to give novices opportunity to slow down and think through their choices.

In this photosketch, the classroom teacher (highlighted in yellow) has paused the novices (green) to coach them through ways to support students (pink) in their initial poem drafting.

Whispered direction

There are times in MFEs when novices are stuck or stumped, and aren’t sure where to go next…but they just need a quick reminder of what they rehearsed. These moments often feel like someone calling for a line from an off-stage support crewmember during a rehearsal. Unlike a TTO, which may be focused on slowing down and considering options, these whispered directions are simple, quick reminders.

In this scene, Kate (yellow) gives a quick whispered direction to Payton (green) to remind her of some questions to pose to students (pink) to help them revise their poems.

Pacing cues

One subtle but important role of coaches in MFEs is to manage the flow of the minilesson as it unfolds in multiple groups – and to do so without disrupting those minilessons. This usually looks like verbal reminders paired with visual cues about what lesson segment each group should be on, or how much time remains before an important transition.

In the photosketch above, Kate (yellow) quickly cues two TTP novice teachers (green) that they have about 1 more minute with their students (pink) before they should transition to partner sharing of their poems.

Fishbowl dual-level modeling

The ‘fishbowl’ structure is widely used and for a range of purposes. In MFEs, we used a fishbowl structure to model writing practices the second grade students would be using, as well as teaching practices the novices would be using to support student writing. This dual-level modeling, with reflective questions posed to the 2nd graders about the writer’s process, provided both students and novice teachers a vision of their work for the day.

In the photosketch above, three coaches enacted a Fishbowl while students (pink) sat on the carpet and TTP students (green) sat around the perimeter of the room. In the fishbowl, Charlotte (yellow, far right) played the role of a student revising her poem and asking for help from Kate (center, yellow) and Mrs. Sparks, the 2nd grade teacher (yellow, left). Kate and Mrs. Sparks then guided Charlotte through the metacognitive process of asking oneself detail-evoking questions to revise their work.

This is by no means a definitive list of coaching practices – or even coaching practices that happen during MFEs. But naming these practices and identifying their purposes and forms can help us be strategic about when to use them – or not.

Have you used these or other coaching practices in your work with teachers, pre-service teachers, or aspiring teachers? Drop us a note about your experience(s) in the comments!

-Charlotte

References

Ball, D., & Cohen, D. (1999). Developing practice, developing practitioners: Toward a practice-based theory of professional education. In L. Darling-Hammond & G. Sykes (Eds.), Teaching as the learning profession (pp. 3-32). San Francisco, CA: Jossey-Bass.

Desimone, L. M., & Pak, K. (2017). Instructional coaching as high-quality professional development. Theory into practice56(1), 3-12.

Forzani, F. M. (2014). Understanding “Core Practices” and “Practice-Based” Teacher Education: Learning From the Past. Journal of Teacher Education, 65(4), 357–368. https://doi.org/10.1177/0022487114533800

Gibbons, L. K., & Cobb, P. (2016). Content-focused coaching: Five key practices. The Elementary School Journal117(2), 237-260.

Gibbons, L. K., Kazemi, E., Hintz, A., & Hartmann, E. (2017). Teacher time out: Educators learning together in and through practice. NCSM Journal of Mathematics Education Leadership18(2), 28-46.

Gibbons, L. K., Lewis, R. M., Nieman, H., & Resnick, A. F. (2021). Conceptualizing the work of facilitating practice-embedded teacher learning. Teaching and Teacher Education101, 103304.

Lac, V. T. (2019). The critical educators of color pipeline: Leveraging youth research to nurture future critical educators of color. The Urban Review51(5), 845-867.

Teaching together in mediated field experiences

Today was our first mediated field experience with the high school students in the TPP study. We met with them in the morning in their teacher’s classroom, and briefly reviewed how to begin the quick image routine (which they would be doing with 2nd graders). TPP students worked in pairs and took turns rehearsing their launches of the routine. There was some nervous laughter interspersed with encouragement from the ‘listening’ partner. After a few minutes of this turn-taking mini-rehearsal, I (Charlotte) invited a few students to do a public rehearsal of their launch, and then did her own rehearsal. We discussed a few key reminders (the central instructions are for students to figure out how many they see and how they see them; ask students to turn and talk with a partner before sharing out; remember to change colors of markers as you annotate different students’ ways of coming to the total number). Then we loaded up our things and walked next door to the elementary school.

Once inside, we were welcomed into Ms. D’s 2nd grade classroom where students were finishing their breakfasts, using the restroom and washing hands, or reading a book –Ms. D. calls this “doing what you need to get done before starting the day.”

We introduced ourselves to the class during morning meeting, in which the students, the TPP students, and the research team members introduced ourselves in a ‘greeting circle,’ followed by the pledge of allegiance and a choral calling of sight word sounds. I noticed as I watched the students participate in these routines that they seemed ready, alert, confident, and comfortable with the expectations their teacher had for them.

Next, I introduced the students to what we would be doing by relating the learning of teaching to learning to ride a bike: that the initial experiences can be wobbly, a little scary (“exciting scary, not dangerous scary”) and that as learners they could support their TPP teachers by being patient, forgiving, kind, generous with their thinking, and encouraging. We then broke into three groups.

The TPP teachers led their quick image routines with cool confidence. I was able to observe Ben and Amira, who facilitated their discussion with a group of 5 students in a small alcove by the cubbies near the entrance of the room. Ben reviewed the instructions, as we’d rehearsed, and gave students a lot of wait time after initially ‘flashing’ the image. He encouraged the students to show a thumbs up when they had an idea to share. Once everyone was ready to share, he collected answers from the students, and then shifted to asking them how they had counted. “By 5s!” was a common response, but not all saw the image this way – one student had counted by 3s, and another had grouped the 5s into rows like  a ten-frame.

The image we used for the day’s quick image is one I made several years ago with multilink cubes of various colors, purposely arranged in groups of 5 (using typical dice layout) in a ten frame arrangement.

Ben waited, listened, and did his best (with reminders from Amira) to show students’ ideas by circling and grouping the cubes with different colored dry-erase markers. Ben moved the discussion to means of representing ideas using numerals – using number sentences or skip counting notation to show student thinking.

After about 15 minutes, Ben and the other two TPP teachers concluded their discussions, using number sentences to record their thinking. Ms. D. gave each TPP teacher a “Bunny Buck” (named after the school’s mascot) to give to students for sharing their thinking with voice, with generosity, and with explanations and reasoning. The students all gathered back on the rug at the front of the classroom for a short (10 minute) model lesson using imagery in a slightly different way. Unlike a quick image, in which students are asked to subitize and use visual patterns to group, mentally count, estimate, or multiply, a notice/wonder image asks students to think a bit more slowly about what they see, how they see it, and how they could use different units to describe the same image:

Sock image. (courtesy of ntimages.weebly.com and @codewod.com).

I had anticipated that this image might get students thinking about units of 1 or 2 – that is, socks or pairs of socks. In the end, we only ended up discussing individual socks – but the students arrived at the total number in several ways:

  • Skip counting by 2s
  • Adding each row as 14
  • Subdividing each row into 10 and 4 more, and adding each row
  • Grouping the 10s together into 20 and adding the 8 remaining socks
  • One student shared the idea that we could find the total by adding 10+14+10+14.

This provided a great opportunity to talk about how teachers can handle ‘wrong answers’ – or in this case, unfinished strategies. The student was suggesting we add 10+14 because both numbers were written on the board – a vestige from when I had been ‘keeping track’ as we counted all together by 2s.

As a group, we discussed (in a turn and talk first, and as a whole group second) whether or not that total would really be 28 (we decided it was 48) and if there were really 48 socks or not (we counted by 1 to know for sure). I highlighted this as an opportunity for students to revise their thinking- and Ms. D reminded me to define ‘revise’ for the students.

I reflected in the moment, and now, whether I handled this student’s error appropriately, or whether I should have come back to her at the end to ask for her thoughts. My fear: what if she hasn’t revised her thinking and still insists that 10+14+10+14 would give us the total number of socks? Even after counting by 1s, some students have trouble deciding that their first thought isn’t the one to stick with. So I decided – perhaps wrongly – to assume (out loud) that she had revised her thinking, and that the issue was settled. I still feel uncertainty in this point, and know that if I were to do things again, I would go about this moment differently.

As students shared and I recorded, Ms. D. pointed out some of the things I was doing, labeling or marking them for the students to emphasize their importance as thinking strategies:

  • Keeping track of what I had counted using circling/crossing out
  • Grouping items into groups of 10 and labeling them
  • Using a number sentence to capture my thinking
  • Recording what the number sentences mean using labels

I (Charlotte) annotated these various ways of coming up with a total. By the end of the 10 minute discussion, our board looked like this:

By the end of our 10-minute discussion, the board reflected circling, grouping, labeling, and recording of annotated number sentences to show how students had arrived at a total number of socks. Strategies discussed (and done chorally) but not written about: counting by 1s and counting by 2s.

I summarized this discussion by pointing out all the students had thought and shared to get to the final answer – and the variety of ways they had approached the problem. Ms. D summarized what she had seen – students sharing, being willing to explain their thinking, and growth in the TPP students, whom she had observed playing games with her students in the fall. You’ve all grown so much in your presence; you look like you’ve been doing this for 10 years now!

As we left the classroom and walked back to the TPP classroom, I overheard some of the students sharing their excitement.

It was fun – they didn’t use all the strategies we thought they might – I’m surprised how quickly I could learn their names – they’re so cute! – I wasn’t as nervous as I thought I’d be….

Back in the TPP classroom, we discussed (very briefly, with only 5 minutes until the bell would ring) the purpose of anticipating student thinking. This isn’t like mapping the directions from here to McDonalds, I told them. This is like searching for McDonalds on the map, and watching the map populate with all the different locations. We’re trying to build a map of the different student strategies that MIGHT emerge, and how we would handle them – not plan for a super specific sequence of strategies we must have shared. But by doing that planning, we’re more ready to hear, listen, and ask in response to what actually comes up.

All in all, we had a wonderful first MFE. I was reminded once again how fortunate we are to have such wonderful partners – the TPP Teacher, Ms. D., her collaborating teacher – and to have one another as we learn about teaching, by doing teaching – together.

-Charlotte

Exploring instruction through teaching sessions

This post is written by Jessica, and undergraduate research assistant in the lab. In this post, Jessica reflects on our first teaching session with the TPP students. Teaching sessions precede MFEs, and in these sessions we introduce new instructional routines and practices through representations of practice – including live models, video cases, and discussions. Learn more about the TPP project here.

I haven’t had much involvement with the behind the scenes actions of teachers. This first teaching session allowed me a chance to peek at the other side of the education system- the teacher’s side.

In our first teaching session, we gathered the group of TPP students we’ve been working with over the past few months to acquaint them with some of the strategies they would be utilizing to teach 2nd graders at the elementary school the next week. Our goal was to familiarize the students with the activity they’ll be leading and hear all of their input on the process. All of the students have at least a general interest, if not passion, for teaching. They are all enrolled in the TTP program at their high school and meet regularly to make progress on their passion.

Our teaching sessions (we held 2 focused on mathematics) consisted of four parts; in this blog post I’ll share is blog post :

  • First, the TTP students experienced the instructional activity, playing the part of students
  • Next, Charlotte facilitated a discussion about the activity, what students get out of it, and why it might be worth doing
  • Next, we watched a video of another teacher leading the activity in a real classroom.

In the second teaching session a few days later, the TPP students would be

Experiencing Quick Images through a live model. The Quick Images activity itself is simple. After sitting all the students down, Charlotte flashed a brief picture of dots on the screen, giving the students only a moment to try to figure out how many they saw. The students were then given a second quick look at the photo to confirm or adjust their initial thinking before sharing out loud how many dots they counted. All the answers were recorded in a small box off to the side of the board to de-emphasize the importance of the answer. The goal of placing the answers out of the way is to allow students to focus more on their process of getting their answer rather than its accuracy. By doing so, this positions them as competent, and permits them to be more inclined to share the thought behind their answer, even if it was incorrect. Once the answers were “out of the way,” students shared how exactly they counted the dots. Answers varied widely! Some students counted the dots and filled in the gaps, others created groups in their head and then multiplied them together. Interestingly, none of them counted the dots in the same way. As students shared, Charlotte annotated the image on the screen to help others understand.

As students shared how they saw the dots, grouped them, and counted them, Charlotte annotated the board, later adding TPP students’ names next to their strategy so that ‘their way’ could be referred to by other students.

Discussing the activity and its potential. After the activity was finished, the TPP students were invited to share their overall thoughts on the process, and how they felt about carrying it out with elementary students in the future. Some things they mentioned were feelings of curiosity about one another’s ideas, enjoying getting to think about the problem and their ideas, and surprise at how differently their friends thought about the same image.

Dr. Sharpe asks the TPP students what they felt and experienced as they engaged in the quick image routine she modeled in the first teaching session.

A second representation: video case. Next, we watched a video of the same routine being carried out by a professional teacher in an actual classroom, pausing regularly to take notes of the teacher’s behavior and response to the kids. We noticed constant encouragement, whether or not the student was correct. Afterward, the TTP students were given hard copies of the image they would be using in their first quick images lesson in the partner 2nd grade classroom – along with a blank lesson plan document they could use to prepare their lesson together during our next teaching session.

This first teaching session set up our foundation for these future teachers, as well as our own research project. Our objective is both success in the second graders’ education, as well as confidence and success for our TPP students as well, and it is on the right track.


Jessica’s reflection

My own personal teaching experience is very limited. I’ve always been the student in situations like these, and my only partial exposure to teaching would be tutoring my brother, which is hardly considered an accurate representation of what it means to be a teacher. Most of my research on this project has been very information-based, and I haven’t had much involvement with the behind-the-scenes actions of teachers. This first teaching session allowed me a chance to peek at the other side of the education system- the teacher’s side. The prep for this session involved a brief overview and a paper guiding the students through what they could expect that day. The thought that went into actually discovering and prepping the activity was certainly overlooked. I also found myself admiring the student-to-teacher dynamic. I believe the education system should focus most on the relationship between the two groups, rather than just the students or the teachers. This teaching session showed a casual but respectful correspondence with every high schooler, which was so interesting considering how differently each student seemed to learn.

Interviewing on-the go

Traditional ‘laboratory style’ interviews posed challenges to our philosophical views of our participants – we see them as knowers who draw on vast sums of Community Cultural Wealth (Yosso, 2005) as students and prospective teachers. In the TTP project, we utilize Walking Interviews as a methodological tool. In this post, Hanyi describes what he has learned about the method.

At the start of the TTP pilot project, we were only just getting to know the participants. Though the larger project would involve multiple phases of intervention with TTP students – including teaching sessions and mediated field experiences – we preceded these interventions with a one-on-one walking interview with each participant to learn more about their perspectives as students and aspiring teachers. During the interviews, we recorded with a portable voice recorder – this was set to ‘lock’ and handed to the participant to put in a pocket after they clipped a lapel microphone somewhere on a shirt or hoodie. We then asked the student to guide us through their High School. We opened each interview casually, and chatted with them as we walked around – asking them what they thought of the school, and what schools they’d attended previously.

Photosketch depicts a woman and young man walking down a hallway. The woman is carrying a clipboard an a pen; the young man has a microphone clipped to his shirt. The hallway is lined with lockers, and they are talking.
Dr. Sharpe (right) interviews Ben (left), a senior student participant in the TTP class.

Students took us throughout the building, pointing out the cafeteria, the second floor library, various classrooms, the music room, and the gymnasium. During the walk, students were asked about their experiences in certain parts of the building (they had been asked to show us their favorite places in the school). As students walked, guiding us on a tour of their school, they often met and greeted different people, including many teachers who have taught them. This often prompted students to remember new ideas to add to their initial answers to a central question in our interviews: “What makes a good teacher?”

The following snippet of a transcript from Dr. Sharpe’s interview with Ben*, a student in the TPP study, illustrates one such moment.

Charlotte Sharpe  Alright where should we go?

Ben Well, we can walk out to the library. Mr. K– at the desk at the standing desk desk, that’s Mr. K–. He was my 10th Grade History teacher. He’s really cool. I like the way he teaches. He never stands in one spot and he doesn’t just lecture you about it.

Charlotte Sharpe  What does he do?

Ben  He – he makes sure to move around the room so you’re always following him. So you can’t get tired. And then he’s always Yeah, and he’s always like asking question, and I don’t know why but he gives out these cards. And it’s like a reward. It doesn’t do anything. It’s just a card. And I don’t know, I just wanted a card. So I kept answering questions.

Charlotte Sharpe  So it sounds like he kind of found some strategies to motivate you.

Ben  Yeah. Like he did that with all the kids. Like, if you answered a question, he would hand you the card, and it would be plus five points to your grade. But I didn’t really need it. I probably got hundreds because I kept answering questions for the cards. Oh, it’s closed….

After 10 minutes or so of getting a ‘tour’ from each student of their building, we would make our way to a private ‘career center’ room near the front office where we could talk more extensively; by this point, the students were more comfortable and open than they had been at the start of our walk, and had taken on an attitude of guide and knower rather than student and learner.

Following students on foot is more conducive to interviewing them sitting in a set place for an interview. Students develop a sense of ownership when guiding guests around a place they are familiar with. It’s like they’re in their own home and they don’t seem nervous. However, if they sit in one place for a one-on-one interview, they may feel isolated and nervous about saying the right thing – self-consciousness, in other words – particularly when the interviewer is a college professor who will be working with their class.

Another benefit of walking tour interviews is that students have plenty of time to think about the questions we ask and compose their answers. Silence is very noticeable in a face-to-face interview; this gives students very little time to think, and may result in missed information. Imagine, for instance, that during a seated face-to-face interview, I give a question that my interviewee needs to think about. During this reflection process, everyone is quiet. I sit, looking at the interviewee out of respect. Is he waiting for my answer? I’d better just say my first thought, the participant may think. However, walking one behind the other (or two side-by-side) can give the respondent a moment to reflect and collect their thoughts without feeling rushed or nervous.

-Hanyi

*Ben is a pseudonym, as are all names for research participants used on the blog.

Yosso, T. J. (2005). Whose culture has capital? A critical race theory discussion of community cultural wealth. Race ethnicity and education8(1), 69-91.

Exploring fraction operations with Choral Counts

I think sometimes it’s easy to see Choral Counts for their glitter, and miss their substance. People quickly fall in love with them because they’re fun, engaging, interesting, and they get kids talking about math. And these are great reasons to love and choral counts!  Beyond all this fun, though, choral counts (and the representations they produce) can support students to investigate really critical concepts – even in the older grades.

Yesterday I worked with some 5th grade teachers to plan some choral counts they can use in their current unit, which is all about fraction multiplication and division – specifically, division of whole numbers by fractions, and vice versa. Can choral counts support students in this unit? Absolutely.

Check out this count we went through yesterday. We counted up by 1/3, starting at 1/3, using rows 4 across. I specifically chose to use rows of 4 in this count to make it “offset” in a way that would create some neat patterns. We found lots! What patterns do you see in this count?

Here are some we found:

  • The down-left diagonals increase by 1.
  • Three hops ‘down’ the column is an increase of 4 (this is especially apparent for the whole numbers, so that’s where I marked them.)

Each hop ‘down’ a column is an increase of 1 1/3.

  • There are some “missing” whole numbers in each column: for instance, in the third column, there’s no 4. In the fourth column, there’s no 7.

By drawing a little box where all the missing numbers are, another interesting pattern emerges…

Ok ok ok, we could do this all day. But what about exploring fraction multiplication and division with this count? 

Consider posing the problem 8 ÷ 1/3. How would you solve this problem mentally? How might 5th graders?

Now, try using the finished count to solve this problem.

.

.

.

(Think about it on your own before you scroll down.)

.

.

.

One way of thinking about 8 ÷ 1/3 is, “how many 1/3 counts does it take to get to 8?” So we can get the solution by counting our ‘hops’ in the count. Because we didn’t start at 0, we count the numbers, not the hops.

Something that struck us in our PD meeting yesterday was that this is a nice way for students to confront their (totally reasonable) preconception that dividing always ‘makes something smaller.’ But how can we hammer that home?

Consider adding more problems in a string – building larger divisors. How could you use the count to figure out
8 ÷ 2/3? Students first have to figure out what 2/3 looks like. Can you build 2/3 by grouping 1/3’s? Sure! So how would that help us solve the problem? Count the hops again – only this time, we’re counting 2 hops at a time.

Something we’d want students to really be firm on: 2/3 is larger than 1/3. It’s a larger divisor.

So, let’s check out one last problem:  8 ÷ 4/3. [First: we want students to make a mental note. 4/3 is larger than 1/3 and 2/3.] Woah woah woah – dividing by an improper fraction?? Why not? Again, students need to first figure out where 4/3 appears in the count: can you build 4/3 by grouping 1/3’s? sure!  So using the same process we did above, we build a larger divisor and count those hops.

So now, let’s check out this string of problems and solutions that we’ve created. What might students notice? What big ideas might this string help them to make sense of? What questions might you as a teacher pose to students to get them thinking about those big ideas?


So, in sum, here are some big concepts you might explore in a choral count like this one:

  • Fractions can be decomposed into unit fractions – and unit fractions can be grouped together into larger chunks – even into chunks larger than 1! This is actually a 4th grade standard, but it’s very likely that 5th grade students need more opportunities to see this concept in action.
  • Dividing something relatively big by something smaller means fitting small things into something big. So we shouldn’t automatically expect the quotient to be a smaller number than the dividend. This is essentially applying a 3rd-grade understanding of the meaning of division to fractions – and thereby arriving at a key 5th grade standard.
  • The larger the divisor is, the bigger the thing is we’re trying to ‘fit’  into the dividend. A related idea is that the closer the divisor is to 1, the closer the quotient will be to the dividend.

Have you used choral counts in your classroom to explore and model similar concepts? Tell me about it in the comments – I’d love to hear!

Fraction Kits – beginnings

So far in summer school, we’ve been working on sociomathematical goals: getting students accustomed to routines and procedures for sharing their thinking in pairs, in written work, and in whole-group dicussions.  Mathematically, the activities and lessons we’ve used to develop these goals have been focused on multiplication and the relationship between skip counting, grouping, and array models of multiplication. This has helped us identify students who need extra support (since multiplication isn’t ‘new’ content for 3rd grade) while also being a slightly more approachable area to start number talks with.

Last week in our classroom, we began work on the content standards that gave our 3rd graders the most trouble on the end-of-year assessments administered by the state and by the school: fractions. Specifically, these students need additional support in understanding what a fraction represents, how fractions can be represented on linear models, and how fractions can be different and yet equivalent. To start this work last week, we began by creating Fraction Kits based on the insight and advice of Marilyn Burns, whose book has been an excellent tool for lesson planning and mapping the mathematical terrain we need to help students explore this summer.

Monday and Tuesday we spent time counting collections, and observing how students were grouping objects.

Wednesday we began math class with a mental math number talk, solving and discussing strategies for 6×7. I was glad to see that students were willing to persist even if they didn’t “just know it” from memory – they were willing to think and find a means of figuring out the problem.

After our number talk, students returned to their seats where each received a set of pre-cut strips of construction paper and a large envelope cut from similar construction paper. They wrote their names on the envelopes and tucked them inside their desks.

Next we went through the process of folding our strips. For each strip, we:

-folded (I first modeled how to fold them)
-predicted how many sections there would be before opening to see
-decided as a group how we might then label each section
-waited for each student to fold, unfold, label each section, and label the back of each section with initials.

Once every student had their fraction pieces folded, labeled, and affixed with initials, we passed out scissors and got them cutting.

Why do, We do, You do?

I want to note that ordinarily, I steer away from “I do, we do, you do” type teaching. However, for creating fraction kits, I modeled first, together we decided how we might name/label, and then asked students to do it on their own. The reason I thought modeling and duplication was fitting in this instance is that our goal was for students to create tools that they could then use to explore fraction relationships. If their kits weren’t created correctly (and some weren’t: a couple students mis-folded and needed help to tape or re-cut later), they might develop some sneaky misconceptions about how much bigger 1/4 was than 1/8, etc.

So why not pre-cut the strips?

Giving the students a chance to fold and cut did elicit some students’ initial ideas about what those weird hyroglyphs called fractions might mean: many students were catching on to the pattern that “8 pieces mean each is called 1/8” and so on. Folding their own strips was also a useful opportunity for them to consider what happens when you take a half and fold it in half. For instance, when we folded the strip into 1/4ths, many students predicted that we would unfold the strip to find 6, 8, or 10 segments, rather than 4. Similar guesses of 10, 15, and 20 came out when we folded the strip into 1/8ths by folding it in  half, half again, and half again.

Wrapping up

Because we opened with a number talk, we only had time to get the strips cut, labeled, and put away on Wednesday. But we did close by asking students to see if they saw any “matches” between strips of different size. This got a few initial ideas out on the table (or in our case, the smart board): two 1/4th sized pieces was the same as one 1/2. Similarly, two 1/8 sized pieces was the same size as 1/4.

Counting Collections: not ‘too young’ for 3rd graders

The students in our 3rd grade summer school classroom have many strengths. They work well with partners, they can commit to a strategy until they have finished a problem, and they are curious and excited to solve problems.

The third grade standards outline that third graders should be developing algebraic reasoning to help them relate addition to multiplication and division, and that they should be developing conceptual understanding of fractional parts of wholes, modeled in sets, area models, and linear models. While some of these goals still seem a bit far from our current students, we are working to approach these goals in stride by building on what they are already comfortable and confident with: counting.

For that reason, we spent time Monday and Tuesday doing some counting activities: Counting Collections and Choral Counting.

Counting Collections

I learned about Counting Collections as an instructional routine from the good folks at TEDD.org, whose work in teacher education pedagogies has been foundational for my own work as a teacher educator at Syracuse University.

Counting collections is an engaging, hands-on activity that packs a lot of ‘punch’ mathematically. Students work in pairs and are given a collection of objects to count, and some kind of sorting tool.  They devise a way to count their collection, follow through with their plan, then represent their thinking on paper using words, pictures, and/or numbers. This activity is great for getting a view into how a student relates counting to grouping and multiplying. For instance, many students in our class will group objects into the sorting tool, but then proceed to count them by 1s.  Others sort, then skip count. Others will sort them out, count up the groups, then multiply to find the final answer.

Collections I use: rocks, vase stones, marbles, cotton balls, multilink cubes, 1″ wooden cubes, 1cm plastic cubes, pennies, red/yellow counters, plastic drinking straws, small cloth hair bands that come in packs of 200 or more [The dollar store is great!!]. Most of the collections are around or just over 100.

Sorting tools: egg cartons, small dixie cups, 8oz styrofoam cups, 6″ styrofoam plates, rubber bands, large egg cartons (The kind that hold 36 eggs).

The routine:

1. Expectations!

We start by outlining (and on subsequent days, reviewing) expectations for student work during a counting collections activity:

  • Respect your partner by taking turns, being kind, trying to help, being fair
  • Respect the materials by taking care of them, keeping them clean, putting them away at the end like you found them
  • Listen and Explain to understand – don’t stop until you both agree and understand on how you’re sorting, organizing, grouping, counting
  • Help your teachers understand your thinking by explaining with words, by writing neatly, by using words, numbers, and pictures to show how you grouped and counted

2. Find a partner, find a seat!

Students get with a partner and move to a place on the floor where they have some space to themselves. I recommend not working at a desk, because small things (pennies, marbles) will roll off or slip through cracks.

3. Pass out collections.

Certain collections will become extra treasured (in our case, the marbles), so emphasize that you’re passing them out randomly, but that each student will get opportunities to count new collections each time. Something we haven’t done that I plan to implement: adding a “log sheet” index card to each collection baggie, so that each pair of students can write their names to keep track of which they’ve counted and which they haven’t.

4. Get counting and recording.

As students work, the teachers move around the room, asking students to explain how they’re grouping and why, and how they’re using those groups to help them count. This is a great opportunity to press on students who seemed to have chosen an arbitrary group size (one pair of students in our class grouped their paper squares by 6s, but because they weren’t comfortable with their multiplication facts for 6, ended up counting by 1s). Other students might need very little press or questioning to realize that they can combine their groups into larger numbers – such as a group of girls who realized they could combine their cups of 5 marbles into cups of 10 marbles, which was more efficient to count by.

Students then record their counts on a recording sheet, which provides more space to show how than to show their answer (for a reason!).  Ultimately, objects get lost or misplaced, so there’s no way of really knowing whether the students were ‘right’ in their counting – this is more about seeing how they’re representing objects and numbers (do they have to draw every object, or can they use numerals as shorthands? Are they adding or multiplying? Can they articulate their thinking in writing yet?).


Overall I’m impressed with how the students are doing, and I’m eager to see how they’re able to extend their reasoning from the counting to mental math problems involving multiplication.

Bright Idea: A multiplication 3-act task in a 5th grade classroom

This reflection comes from Connor, who enacted @gfletchy‘s task Array-bow of Colors with 5th graders this past spring.


My instructional goal for this lesson was to have students make the connection between repeated addition and multiplication while solving a problem. Students worked towards this instructional goal in the strategies that they used to solve the problem when working independently and when sharing their answers. I chose the order of responses so that the students would first see how to multiply by breaking the numbers down. Next, they saw how to solve the problem using the traditional algorithm of multiplication. To connect the two multiplication strategies to repeated addition, I had a student discuss how they skip counted to find the answer. The student did not have the opportunity to finish the skip counting, but as a class we discussed how to skip count, which numbers to use, and when to stop.

The Three Act Task started with the students watching the first video. The students noticed many things that I did not notice when I watched the video. For example, one student described that as the skittles were poured into the jar they made a pattern. One other student noticed that the skittles were poured into the jar until it was filled. To extend off of this, and to clarify for the rest of the class, I asked the student where the jar was filled to (to the very top, or to some other point in the jar). I realized after teaching the Three Act Task that I forgot to have students participate in a turn and talk with the person or people sitting next to them. If I taught this lesson again, I would make sure to have students have an opportunity to share their responses with their peers.

After writing down their notices, the students watched the video again and wrote down any wonders that they had. The students participated in a turn and talk with the person or people sitting next to them. The responses that I received were all relevant to the central question. For example, one student asked, “How many wrappers were left over?” Another student asked, “How many bags did he put in the jar?” I was able to make a connection between these two questions, and how they both asked sort of the same thing. The students were able to come up with the central question as one of the wonders. For this three act task, the central question was, “How many skittles were in the jar?”

After writing down the notices and wonders from all the students, I introduced the estimation portion of the lesson. The students were all able to write down a low and high estimate, but some of their estimates could have been better. For example, one student wrote his low estimate as 1. While this is correct, there is a better estimate that he could have written down. When practicing for this lesson, I tried to think of a way to help the students make better estimates. In the video of Graham teaching his Three Act Task, he told the students to, “be brave” when they were making their estimates. If I taught this lesson again, I would try to think of a way to help the students make estimates that were ambitious, but also based on what they already knew.

To move forward from the estimation to solving the problem, I first asked the students how confident they felt about their estimates. Then I asked the students what information they would need to help them make more confident. I phrased the question like this, because even though they are answering the question, how many skittles will it take to fill the jar? The answer is an estimate based on the assumption that there are 14 skittles in each of the bags. The students used the number 14 when solving the problem, but in reality, there were different amounts of skittles in each of the bags. I asked the question to the whole class, but only one or two students raised their hands. To promote more participation, I asked the students to participate in a turn and talk with the person or people sitting next to them. When the class came back together, the students explained that they would need the number of skittles in the bags, and how many bags were used to fill the jar. When giving the students the information, I was careful to state that there were 14 skittles in this bag (the bag that was shown in the picture).

The students also correctly identified that they would need to know how many packages of skittles were used to fill the jar. First I showed the students a picture of a pile of all of the packages and asked them to estimate how many there were. When sharing their responses, the students did not appear to have used a strategy to estimate, and instead just took a guess. To finish this portion of the lesson, I showed the students how many packages were actually used (58). The students began to work on answering the question.

When I circulated around to observe what strategies the students were using, I noticed that there were three main ones.

The first, and most common strategy that students used was to set up a vertical multiplication problem with one number on top of the other. While many students were able to set up the problem correctly, not many were able to get the correct answer. After teaching my lesson, I found out that the students have not learned how to do double digit multiplication using the traditional algorithm. In their work, the students would multiply one digit by the other two (for example in 58 x 14 the students would multiply the 4 by the 8 and 5), but would not finish the problem by multiplying the other digits together. In addition, one of the other challenges that students had with using the traditional algorithm was that they had trouble lining up the digits to get a correct answer. Even if the students multiplied the digits correctly, when figuring out their answer, the students would not line up the numbers correctly, and as a result would not get the right answer. To help students understand how to use the traditional algorithm correctly, when sharing answers, I made sure to talk about the place value of each of the digits in the number. I also walked the students through the multiplication process and how the algorithm was used in this problem. My teacher told me that the students will be learning how to use the traditional algorithm soon, because it is on the state test in the beginning of May.

Another common strategy that students used to help them solve the problem was to break one of the numbers up and then to multiply it by the other number. For example, when implementing this strategy, one student broke 58 into 50 and 8. Then he divided each number by 14 and added the products. The student got the correct answer using this strategy.

One last strategy that some students used was skip counting. The students used this strategy most often to add 14 together 58 times. When sharing this strategy with the students, one identified that while this strategy works, it takes a long time, and can be hard to add together. Based on this, I asked the students if skip counting and repeated addition would only work with 14. The students replied that they could use the same strategy for 58, but also explained to me that it is harder for them to add 58 together 14 times. I tried to connect the repeated addition strategy that was used to the two multiplication strategies by reviewing one of the claims that was made in the mental math. In the mental math, one student explained that repeated addition was a longer way of doing the multiplication. To review that in my lesson, I asked the students what numbers they used in the addition sentence, and how this connected to the multiplication that was done earlier. The students were able to identify the connection that they discovered in the mental math.

At the end of the lesson, I revealed the answer to the students. They were confused as to why the answer that Graham Fletchy got was different from their answer. To help them understand why, I offered up a situation where two of the students have the same brand, size and type of chips. I asked the students if each of the bags would have the same number of chips. Some students still appeared confused by this situation, but others began to understand what I was saying. One student explained that if they counted to make sure that every bag of chips had the same number of chips in it, the factories would not make that many bags each day. Transitioning back to the lesson, I asked the students how they could connect the chip scenario to the skittles. One student raised her hand and said that just like the bags of chips, each package of skittles would not have the same amount of skittles in it. Going off of this, I explained that we only knew how many skittles were in the first package, and not how many were in each of the other bags.

To finish my lesson, I gave the students an exit ticket, asking them to determine how many skittles were in a case of skittles that was pictured on their exit ticket. The students were given the number of skittles in one package, and how many packages were included in the case. From this, the students solved the problem again. One of the changes that I saw between the work they did in the lesson and the work they did on the exit ticket, is that more students used the second strategy on the exit ticket. Many of the students broke up the number 36 into 30 and 6, then tried to do the multiplication. However, some students still seemed stuck when they went to multiply 56 x 30.

From this lesson, I learned that my students can apply previous strategies that they have learned to new situations. In this lesson, I was not teaching the students any new strategies, or ways to solve a problem. Rather, I was seeing how well they can apply strategies and techniques that they have learned already. The students proved they were able to do this by using the multiplication strategy that my host teacher taught them earlier in the year, and by relying on their knowledge of skip counting.

I also learned from this lesson that my students need some strategies to help them make more educated estimates. In the lesson, the students first made estimates about how many skittles they thought would fill up the jar. The students’ estimates were not always realistic, and many of the students put estimates that were safe. For example, when asked to write a low estimate of how many skittles would fill up the jar, many students wrote down 1. While this is correct, there were other, higher numbers that could have been used that were more ambitious. The students next used estimation when trying to figure out how many packages of skittles were used to fill up the jar. The students guessed estimates that again did not seem realistic. When asked how they came up with their estimates, none of the students had a strategy that they used. Instead, it became clear to me that the students were just guessing how many packages were used.

If I were to teach this lesson again, I would change the way that I wrote down the notices and wonders. In my lesson, I set up two pieces of paper in the back of the room where I wrote down the notices and wonders. However, because of the placement of the papers that I was writing on, the students had to turn around in their seats to look at me. This led to many students not looking at me when I was teaching, and students having to turn around every time that I wanted to talk to them. One other thing that I would change about the notices and wonders section, is that I would write them neater, and also larger. I noticed after writing down the notices is that they were very small. I tried to write larger when writing down the wonders, but they could have been neater. One of the problems that I ran into, was that I did not want to turn my back on the students for too long.

If I were to teach this lesson again, I would also try to ask more questions about the strategies that students used. While I asked questions about the strategy that was used, looking back, I should have started with more basic questions like, “How did you know to multiply 58 and 14 together?” This would have allowed every student to understand the strategy before moving on to more complicated questions that would establish connections between the strategies.

If I were to teach this lesson again, I would also ask the students to draw a picture of the problem. This was not a central focus of my lesson, so I did not emphasize it as much as I should have. Creating a visual representation of a problem is important because it helps students make sense of the problem. I decided not to push the students to draw a picture of the problem because it was not a strategy that I saw the students using. I did not know how to introduce this strategy, or if it was something that I should introduce. Instead, I decided to focus more on the strategies that I saw students using.

Based on this lesson, the next choral count, mental math, or Three Act Task that I taught would be focused on connecting a picture of a problem to repeated addition and multiplication. After the sequence of lessons that I taught, I am confident that students understand the connection between repeated addition and multiplication. In my next lesson, I would try to extend that connection to creating a visual representation of the picture. This would help students make sense of the problem that they were trying to solve, as well as seeing how repeated addition and multiplication are used, and where each of the numbers in the number sentences comes from.


8+9: four strategies for counting and adding

Yesterday was our first mental math as a 3rd grade summer school class. This mental math number talk was designed to be a ‘warm up’ to the instructional routine; in terms of the standards, this problem would be well suited for late first grade. However, I wanted a problem that would be slightly easier than the 3rd grade standards, so that the students could focus on developing productive norms for number talks.

I started by discussing with the students what a number talk was, what mental math was, and what their jobs would be: to think about the problem and multiple ways of solving it, to talk at a conversation level to their partner and listen to their strategies, and to be ready to share with the class AND listen to their peers’ ideas during whole-group discussion.

We rehearsed these norms and actions several times, first with questions designed only to get them used to holding their ideas privately until asked to share with a neighbor: “Think of as many animals as you can that are green” and then “Think of something you have exactly 3 of in your house.” Students are generally pretty eager to share responses to these kinds of questions, so they are helpful for giving them a chance to practice holding their ideas private until asked to talk to a partner or share with the class.

We then did one more ‘practice round’ with the problem 2+2 to again reinforce, review, and label productive student actions, like showing on their fist with fingers how many strategies they had, holding their ideas privately until asked, then sharing at a low conversation level with a partner once asked.

When it was finally time to do the ‘real’ problem for the day (8+9), these norms were pretty firmly in place. I had a few kids whisper “ooh i know it!” to themselves, but using a gesture of “quiet” and modeling my own fist to my chest was sufficient reminder for them to be thinking about strategies, holding their ideas private until called on.

After I saw that nearly every student had at least 1 finger raised (probably 45 seconds), I asked them to turn and talk to a neighbor about how they thought about the problem. The students did so well, and I heard many of them trying to explain their thinking in addition to sharing their answers.

After about 30 seconds of partner time, I called their attention back to me (I use “class class” –> “yes yes” call and response for this) and asked students to share answers. I called on just about every student and got 17 for all but 1, who said 14.

I then asked for volunteers to share their strategies.

The predominant strategy students shared was counting on, either from 8 or 9, using fingers. Two students adjusted and compensated – one by solving 9 + 9 and removing 1, another by taking 1 from the 8 and adding it to the 9 to make the problem 10 + 7. The last strategy (bottom left) was contributed by my coteacher.

Overall, this number talk was a great start to our summer school theme of using number talks in regular instruction to work on the OA strand. I’m looking forward to Monday!

-Charlotte